Creating a New Form
There are three quick steps to creating a new form:
1
Forms Page
To begin creating a new form, navigate to the Forms page.
To begin creating a new form, navigate to the Forms page.
2
Click + Form
Click the + Form button located at the top right corner of your screen. This opens up the Form Builder options for you.
Click the + Form button located at the top right corner of your screen. This opens up the Form Builder options for you.
3
Choose your Starting Point
Once you click + Form, you’ll see four options: Blank, Template, Duplicate, and Import.
Once you click + Form, you’ll see four options: Blank, Template, Duplicate, and Import.

Here’s what each one does:
- Start from blank canvas: Create your form from scratch.
- Convert to Droplet form: Upload a PDF or image to automatically extract text and fields. This gives you a head start on building your form by using an existing document.
- Start from template: Choose from a variety of pre-made templates that you can customize to fit your needs.
- Create an eSign document: If your organization is a DropletSign customer, you can create an eSign document with an existing PDF here.
Each section below will give you additional context about these four options:
Start from a blank canvas
When you choose Blank, you will immediately enter the Form Builder and a default form name will be generated. You can click the form name in the upper-left corner to customize it at any time.
You can also navigate to the Form Details menu to change the form name, add a description, and configure sign-in options on the form.
Convert to Droplet form
When you upload a PDF or image, Droplet will convert the text and fields, but keep in mind that it won’t configure any workflows or notifications. You’ll want to use the workflow editor to set those up and make sure your form is ready to go.
Tables
A quick tip: Tables in PDFs and images can be a bit tricky for automated conversions. They often need a personal touch to get them just right, so we recommend designing tables yourself to ensure they meet your specific needs.
Plus, the Import option allows you to upload Droplet files (with a .drplt suffix). This is super handy if you’re sharing a form with a colleague from another organization or moving forms between organizations. It brings in both form layouts and workflow settings, saving you time and effort.A quick tip: Tables in PDFs and images can be a bit tricky for automated conversions. They often need a personal touch to get them just right, so we recommend designing tables yourself to ensure they meet your specific needs.
Start from template
Editing an Existing Form
1
Forms Page
To edit an existing form, navigate to the Forms page.
To edit an existing form, navigate to the Forms page.
2
Click 'Edit'
Click the 'Edit' link located on the relevant form card.
Click the 'Edit' link located on the relevant form card.
If you do not see the 'Edit' link, you may not have the appropriate access. Contact your organization administrator.

3
Create a New Draft
To make changes to a published form, you’ll need to create a new draft. Open the version menu by clicking the current published version and selecting + New Draft. This ensures you can edit without affecting the live form.
To make changes to a published form, you’ll need to create a new draft. Open the version menu by clicking the current published version and selecting + New Draft. This ensures you can edit without affecting the live form.

4
Edit your Form
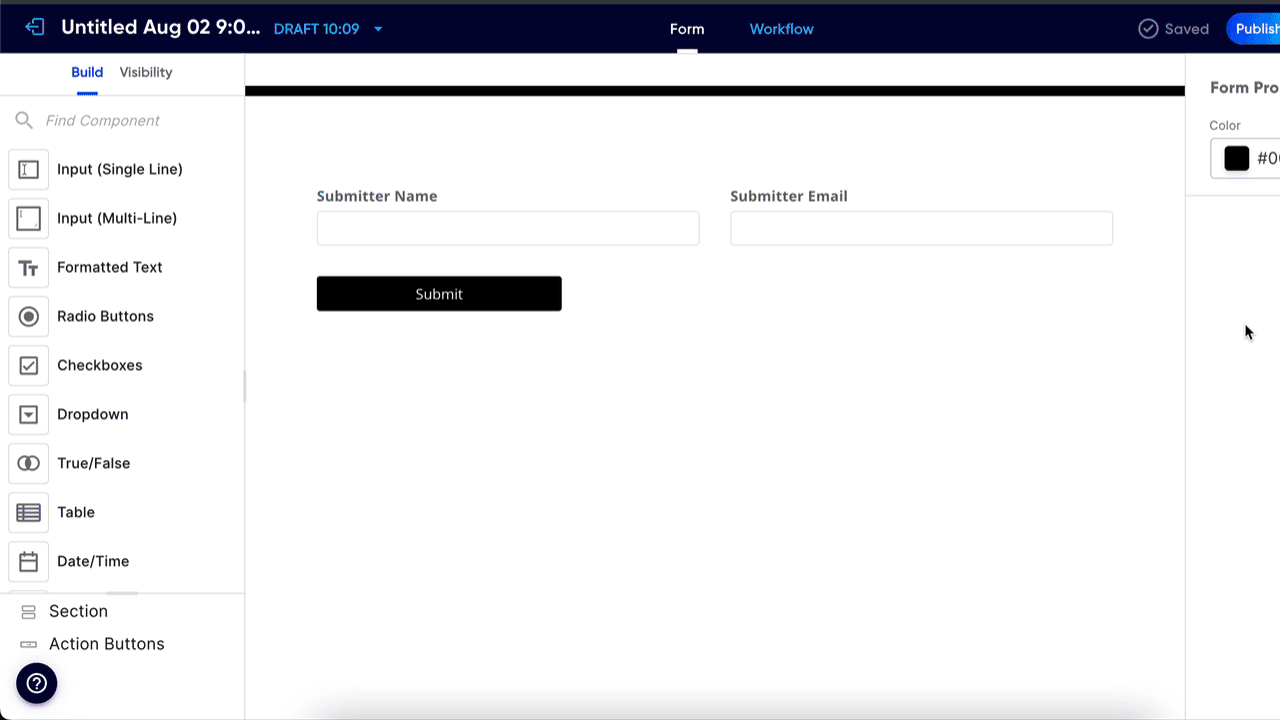
Inside the builder, you can switch between two editing modes: Visual Editor and Code Editor.
Inside the builder, you can switch between two editing modes: Visual Editor and Code Editor.

The Visual Editor is much more intuitive, drag-and-drop experience. But, you can switch to the Code Editor if you need more control over the form's code and advanced customizations.

Pro Tip!
Remember to save your work frequently to avoid losing any changes.
Remember to save your work frequently to avoid losing any changes.
Was this article helpful?
That’s Great!
Thank you for your feedback
Sorry! We couldn't be helpful
Thank you for your feedback
Feedback sent
We appreciate your effort and will try to fix the article