Key Areas
Layers
Forms have two main layers: Form and Workflow.
When you open the Form Builder, your initial view will be the Form layer.
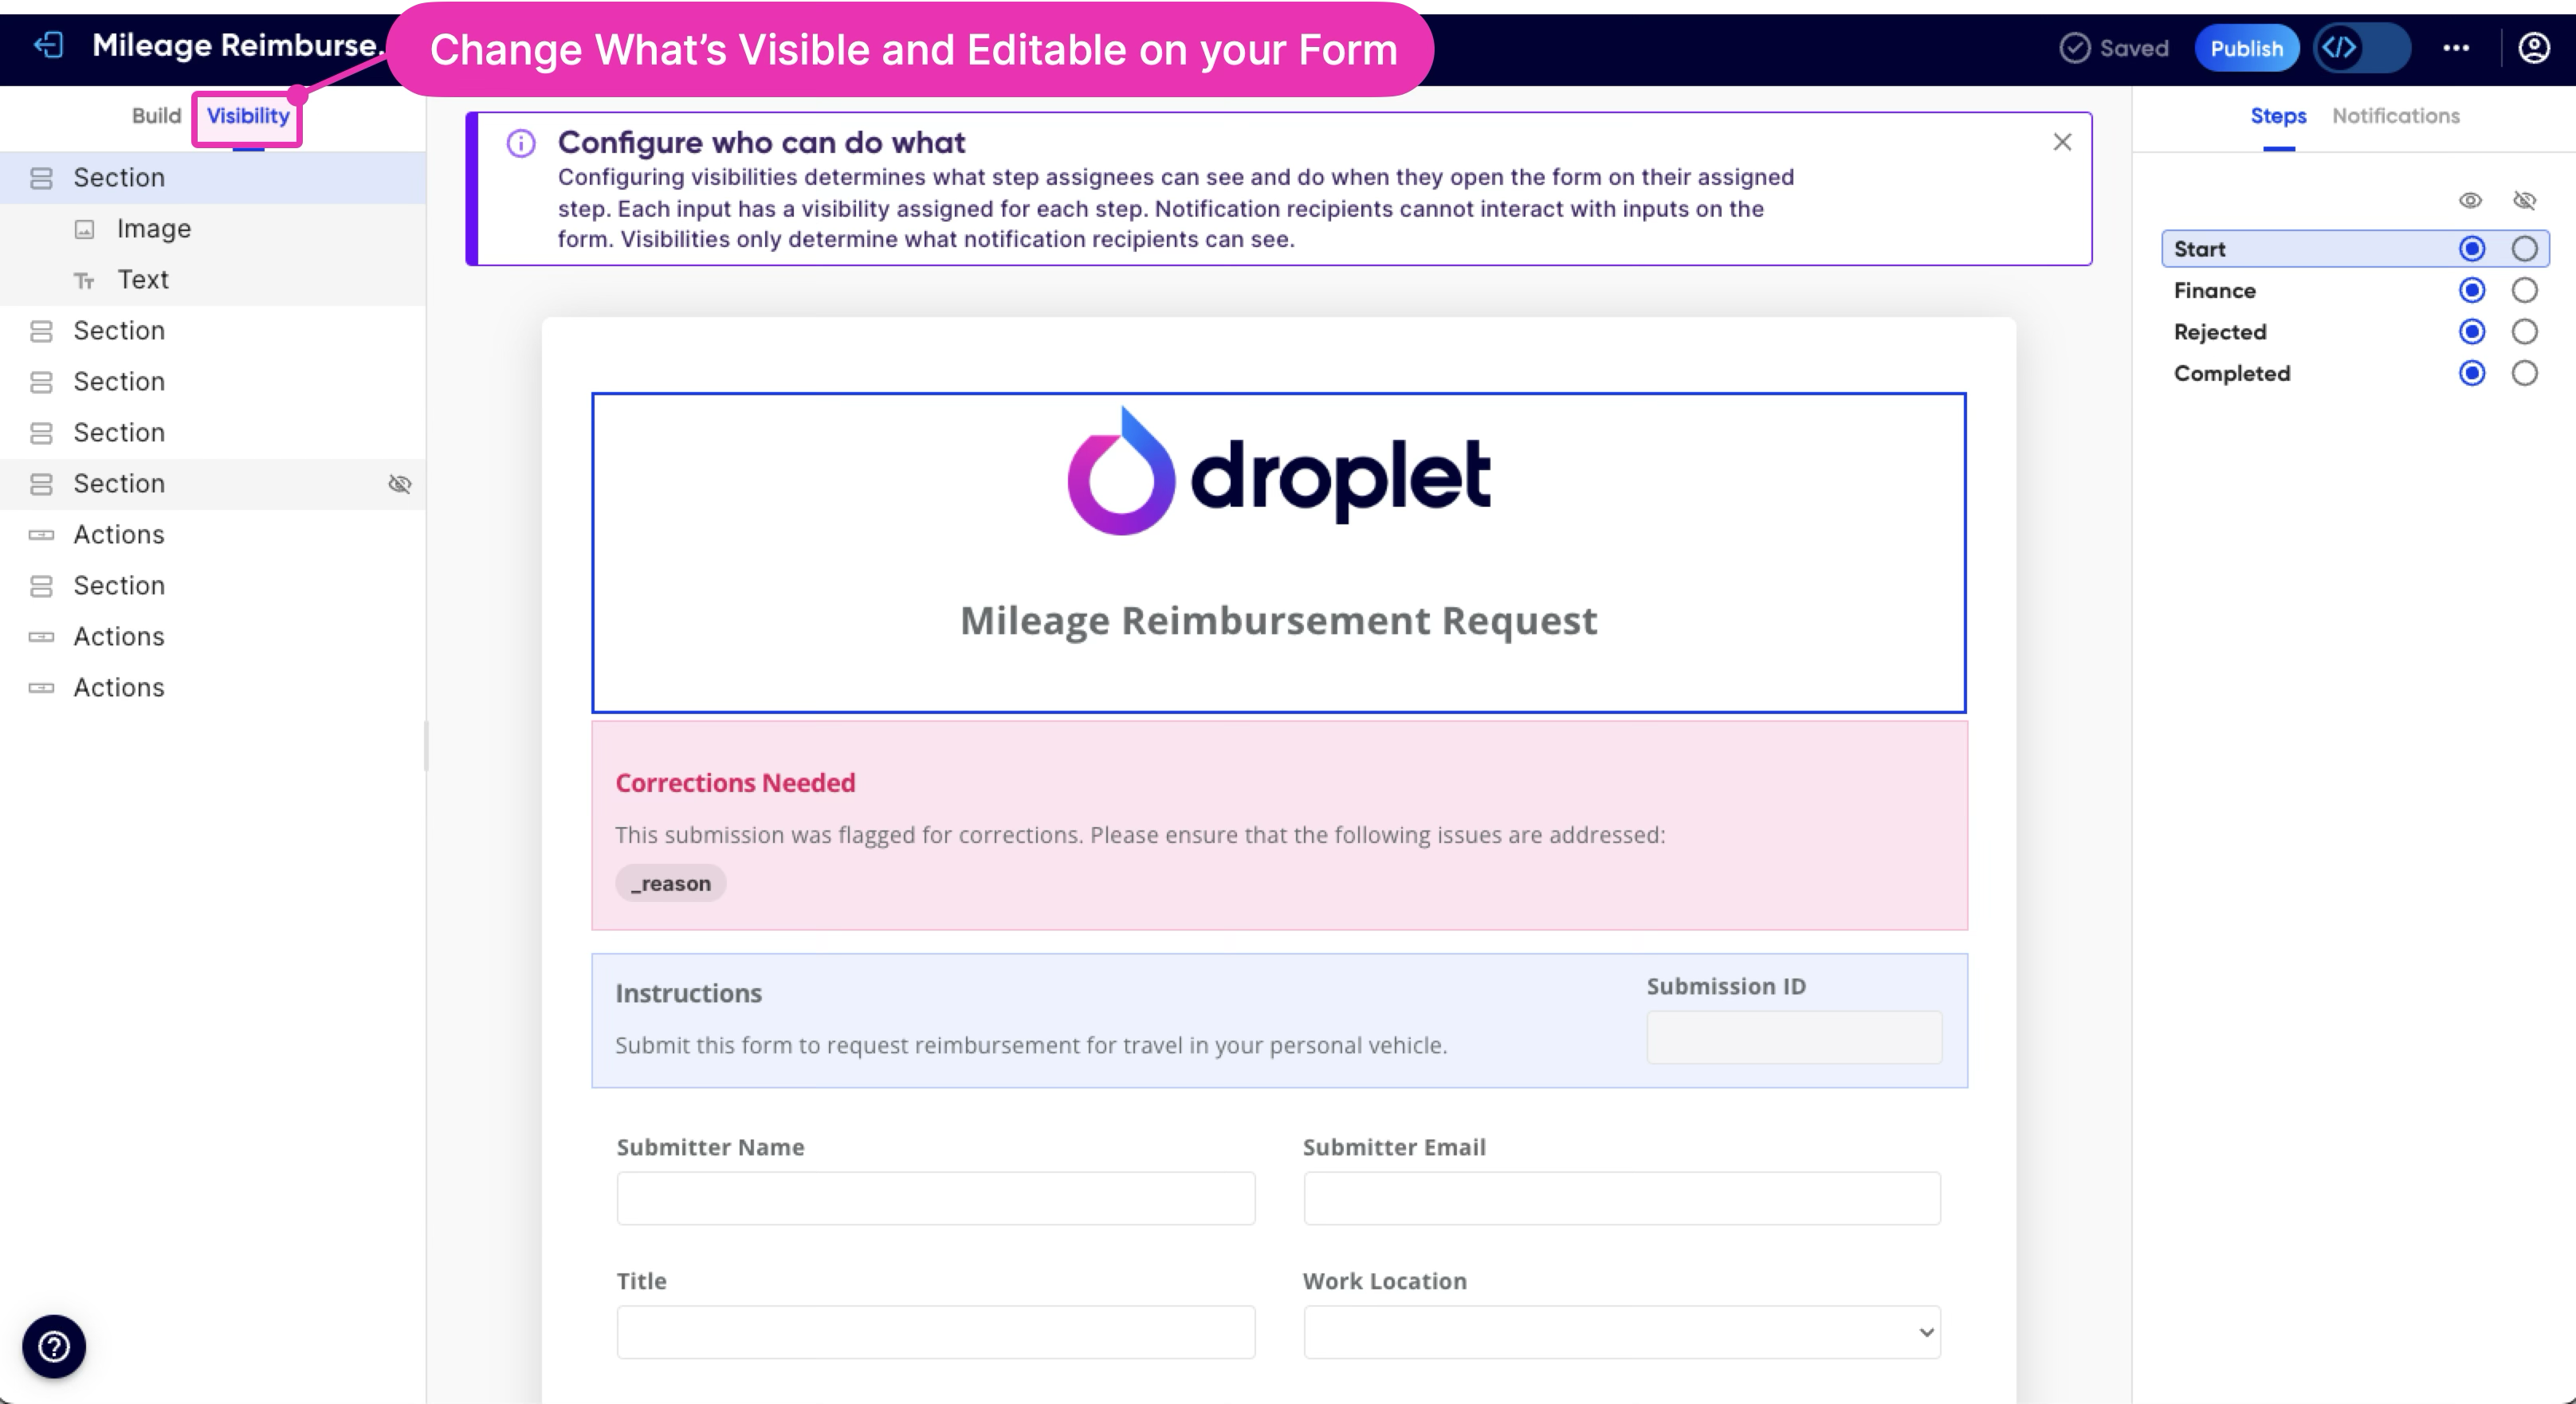
The Form layer has two sub-layers: Build and Visibility.
This is where you design your form layout and is where you will spend most of your time at first.

This is where you control who can see what: fine-tune which sections and fields of your form are visible or editable at various steps of your workflow.

Canvas
Your Canvas is the central workspace for visualizing your form’s structure. Add, edit, move, resize, or delete components as needed.
Components
While in the Build layer, the Components menu offers a library of form elements. Simply drag and drop components onto the Canvas to start building.
Layout Tree
As you add components to your Canvas, a hierarchical list of items will develop in the Layout Tree area. This is expandable while you are editing and can be helpful for rearranging elements on your Canvas or for selecting and manipulating containers (Sections, Groups, and Tiles).
Properties Panel
You can adjust properties for a selected component in the right-hand Properties Panel.
Code Mode Toggle
Occasionally, you may need to switch to Code Mode to configure more advanced aspects of your form, workflow, datasets, notifications, or visibility. Simply click the Code Mode toggle in the upper-right corner of the Form Builder to flip to Code Mode. Click again to return to the Form Builder.
Publishing
When you're ready to publish your form, click Publish in the upper-right corner.
Was this article helpful?
That’s Great!
Thank you for your feedback
Sorry! We couldn't be helpful
Thank you for your feedback
Feedback sent
We appreciate your effort and will try to fix the article